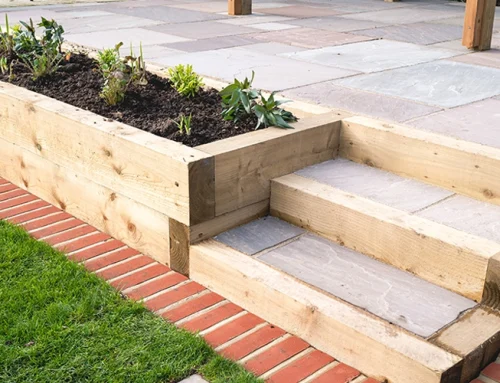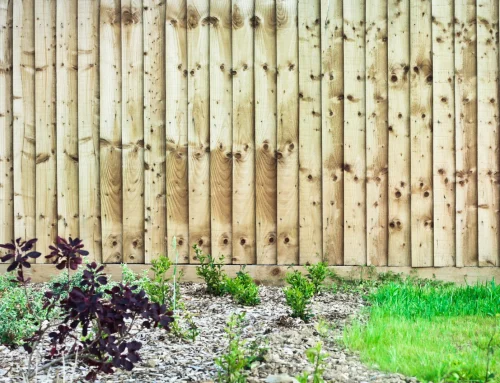


Installing fence panels can transform your garden and improve both privacy and security. With the right preparation and materials, installing fence panels can be straightforward and rewarding. This step by step guide walks you through the process, from planning to finishing touches, so you can enjoy a sturdy, attractive boundary by the time summer arrives.
Why a well-installed fence matters
A well-executed fencing project isn’t just about creating a boundary. It enhances privacy, reduces noise, protects plants from wind, and can even increase property value. By following a clear plan and using quality materials, you’ll minimise future maintenance and enjoy a durable result for years to come. If you’re searching for a reliable starting point, this How to Install Fence Panels – Step by Step Guide will help you achieve professional-looking results with confidence.
Measure your garden and plan your fence layout
The first step is precise measurement and careful planning. Accurate measurements ensure you purchase the correct number of fence panels, posts, and gravel boards. Start by marking the intended fence line along your garden perimeter. Use a measuring tape to determine the total length of the fence run and divide by the width of the panels you intend to use. Don’t forget to account for posts at regular intervals and any gates you plan to install.
Consider terrain and straightness: if the ground isn’t perfectly level, you may need to adjust panel heights or add extra posts to maintain a straight, uniform line. Decide where gates will sit and ensure there is enough space for hinges, posts, and the opening clearance. Draft a simple plan showing post positions, panel lengths, and gate locations. This planning stage sets a solid foundation for smooth installation and helps you order the right quantities.
Mark where each post will be positioned
With your plan in hand, lay out the exact positions for each fence post. Use stakes or spray paint to mark the centreline of each post hole. Measure twice to confirm spacing: typical spacing is 1.8 metres (or about 6 feet) between posts for most standard panels, but check the panel and post specifications you’re using. Marking precise locations reduces errors during digging and ensures panels fit neatly between posts.
If you’re replacing an existing fence, align your new posts with the current line but be prepared to adjust for level and plumb. A laser level or spirit level helps verify that each post will stand true, ensuring panels sit evenly once installed.
Install the fence posts
Dig holes for each post, ensuring they are deep enough for stability. A common depth guideline is to bury at least one third to one half of the post length, plus a few inches below the frost line if you’re in cooler climates. Use a post-hole digger or a power auger to create clean, round holes. The width should accommodate the post plus some extra space for concrete around it, typically about 150 mm (6 inches) to 200 mm (8 inches) in diameter for standard posts.
Before inserting posts, treat the bottom portion with a preservative or cap to protect against moisture and insects. Place a level on the post and backfill the hole with concrete for long-lasting support. Ensure each post is vertical and aligned with the markings. Use temporary braces or supports to hold the posts plumb while the concrete sets.
Allow the concrete to set
Concrete needs adequate time to cure before you mount panels. Read the manufacturer’s instructions for the recommended curing time, which is usually 24 to 48 hours for basic stability, and longer for higher loads or particularly hot or cold conditions. During this period, keep the area clear of traffic and protect the posts from disturbances. Once the concrete has fully set, you can proceed to attach the fence panels with confidence that the structure will handle wind and pressure.
Attach the fence panels between posts
After the posts are secure, the fence panels can be fitted between them. Start at a corner or gate post and work along the run. Place a panel between two posts and check that it sits squarely. Use weatherproof timber screws or nails appropriate for exterior use to fix the panels to the posts and rails. If your fence design uses rails behind the panels, ensure these are level and secured as well.
Make sure each panel is level and properly supported. If you notice any slight warping or unevenness, use wooden shims or adjust the fasteners to bring the panel into alignment. For extra strength and longevity, consider using metal fixings or brackets at critical joints, especially for taller fences exposed to wind.
Add gravel boards and finish touches
Gravel boards can also be added to protect fence panels from ground moisture and extend their lifespan. Position gravel boards directly behind the bottom rail or in front of the posts, depending on your design. They act as a shield against damp soil and help keep panels looking fresh longer. After attaching the panels, insert the gravel boards and secure them with screws or nails.
Beyond gravel boards, you may want to treat the timber with a weatherproof finish or paint to enhance durability and appearance. Choose a high-quality timber treatment compatible with outside exposure and reapply as recommended by the manufacturer. Empress fencing offers a selection of high-quality fence panels and timber fencing materials that contribute to durability and long-term performance, so consider sourcing from reputable suppliers to ensure your project stands the test of time.
Final checks and maintenance planning
Once installation is complete, walk the fence line to inspect for any loose panels, protruding screws, or misaligned posts. Tighten fixings, fill any gaps with matching sealant, and wipe away excess concrete marks from the post tops if needed. Create a maintenance plan that includes regular inspections, cleaning, and re-staining or sealing as required by your chosen materials.
If you’re considering timing, installing fencing in April allows your garden to be ready for summer. With the growing season starting, a completed fence helps protect newly planted shrubs, create private outdoor living spaces, and improve curb appeal as you entertain guests or simply enjoy relaxing outdoors.
A well-planned and properly installed fence panel system offers privacy, security, and aesthetic value to your garden. By following a clear sequence, measure and plan, mark post positions, install posts, let the concrete cure, mount panels, add gravel boards, and finish with maintenance, you’ll achieve a sturdy, long-lasting boundary. The investment in high-quality fence panels and timber fencing materials from trusted suppliers, like Empress Fencing, can pay dividends in durability and performance. Remember, the key to a successful installation is careful preparation and patience, especially when ensuring accuracy in measurements and alignment. With the right approach, installing fence panels becomes a rewarding DIY project that transforms your outdoor space and helps you enjoy a more secure, private garden all summer long. Please check out our 6ft fence panels, decorative fence panels, decorative garden gates and fence posts range for more information.