

Fitting a fence on a slope is a common headache for many DIYers. The challenge is simple in concept but can be tricky in execution: standard fence panels are rectangular and designed to sit level, while a sloped garden forces you to adapt. In this guide, we explore the main options for fencing on a slope, explain the pros and cons of each, and share practical tips to help you choose the right approach for your space. If you’re looking for reliable guidance, Empress Fencing offers expert advice and services that align with these options.
The core challenge – why slopes complicate fence fitting
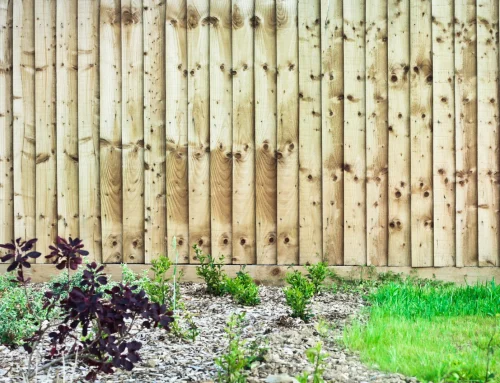
On flat ground, you can simply line up panels and posts, keeping everything plumb and level. When the ground falls away, a bottom gap appears under every panel. The gap grows as the slope increases, leaving a visually unappealing and potentially unstable fence unless you address it. Understanding this flaw helps you evaluate which fencing method will deliver both aesthetics and durability.
Stepped fencing
Stepped fencing is the most common solution for sloped gardens. Here’s how it works and why it’s popular:
- How it’s built: Each fence panel remains horizontal (level) so you get a clean, uniform look across the fence line. The supporting posts are set at different heights to create a stepped visual effect that mirrors the slope.
- Practical considerations: The base of each panel leaves triangular gaps on the downslope side. You can fill these gaps with timber offcuts, gravel boards cut to fit, or even install a low retaining wall to maintain a tidy boundary.
- Visual impact: The stepped approach tends to look neat and orderly. It is easy to predict and measure, making it a favourite for many homeowners.
- When it works best: If you’re aiming for a traditional, precise fence line and the slope is moderate, stepped fencing is typically the simplest and most reliable option.
- Pointers from the field: Keep the steps reasonably small, one step per panel usually yields a better result than trying to span a large drop in a single run. This keeps each panel level and maintains structural integrity.
Arched panels
Arched panels offer a more seamless look that can reduce the visual impact of the slope. Here’s what to know:
- How it’s built: Panels are designed with an arched top to follow the contour of the ground, while the bottom edge sits flush with the slope. The top step down creates a continuous silhouette along the fence line.
- Pros: Fewer obvious gaps at the base, which can be visually appealing on steeper slopes. The arch can blend more naturally with uneven ground and soften the transition between levels.
- Cons: Arched panels can be more expensive than standard panels and may require careful measuring to ensure the arch aligns with the slope and post positions.
- Best use: Ideal when you want a cohesive, flowing look along a hillside boundary without the stair-step appearance.
- Practical note: Ensure you have accurate measurements for the arch height and the slope gradient; it’s easy to misalign the top edge if you don’t plan properly.
Individual boards (featherboard/closeboard)
For a more bespoke, highly precise finish, individual boards cut to follow the slope can be used. This is how it stacks up:
- How it works: With featherboard or closeboard fencing, each vertical board is cut at an angle to match the ground profile so the fence sits flush along the entire length.
- Advantages: It yields an exceptionally tidy, almost seamless look with minimal gaps. The result can be very striking on a pronounced slope.
- Drawbacks: It is the most labour-intensive option and can be more time-consuming and costly due to the extra cuts and labour.
- When to choose this: If you prioritise aesthetics and have the time (or budget) for a detailed installation, this approach delivers a strong, professional finish.
- Practical tip: Accurate layout is crucial. Before digging, mark out every post position and double-check the slope angle so each board sits correctly from the outset.
Practical tips for planning and installation
- Plan your post positions first: Marking out where each post will go before you start digging is essential. It’s easier to adjust in the planning phase than after holes are dug.
- Use a long spirit level or a string line: Establish a consistent grade along the fence line. This helps you keep the panel tops or arched tops aligned.
- Consider gravel boards and slopes: On a slope, gravel boards may need to be angled or cut to sit properly under the panels. Factor this into your measurements.
- Account for drainage and ground movement: Slopes can shift with weather. Ensure your fence design accommodates minor movement and drainage to prevent future issues.
- Safety first: Always check for underground services before digging, wear appropriate PPE, and follow local building regulations or permit requirements.
Not sure which option suits your garden? Here’s a quick decision framework
- If you want a quick, reliable solution with a classic look, choose stepped fencing.
- If you prefer a modern, flowing appearance and your slope is moderately shallow, consider arched panels.
- If your priority is a flawless, continuous line and you’re prepared for extra work, go with individual boards cut to follow the slope.
Fencing on a slope doesn’t have to be intimidating. By understanding the core challenges and weighing the options, such as stepped fencing, arched panels, or individual boards, you can select a method that aligns with your garden’s shape, your budget, and your aesthetic goals. Whether you’re a do-it-yourselfer tackling a weekend project or planning a larger fencing installation, laying out a clear plan before you begin will save time and reduce frustration. If you want professional input or hands-on help, Empress Fencing offers guidance and services tailored to sloped gardens, helping you achieve a sturdy, attractive boundary that stands the test of time.
Please check out our 6ft fence panels, decorative fence panels, decorative garden gates and fence posts range for more information.