

If you’ve never put up a fence before, it can feel like a daunting task. But with the right preparation and materials, fitting fence panels is a very manageable DIY job. This step-by-step guide will walk you through the process, from planning to finishing touches, with practical tips to help you get neat, sturdy results.
What you’ll need
Before you start, gather everything you’ll need. Having the right tools and materials on hand streamlines the project and reduces the chance of mistakes.
- Fence panels (obviously)
- Fence posts (timber or durapost)
- Post mix concrete or a drive-in spike
- Panel clips or brackets
- A spirit level
- A tape measure
- A post hole digger or spade
- Post caps and fencing treatment or stain (optional but recommended)
If you’re aiming for a clean, professional finish, you may also want to have a string line and a pencil to mark consistent heights and alignment.
Plan your run
A well-planned fence line saves time and reduces headaches later. Start by measuring the total length of the fence line. Divide this length by the panel width (usually 1.83 metres) to work out how many panels and posts you’ll need. Remember, you’ll need one more post than you have panels, since posts cap both ends of the fence and set the line for the panels in between.
- Check for any obstacles along the line (gates, shrubs, utility lines) and note where you’ll place posts to avoid surprises.
- Decide on post placement: a standard fence line often uses posts at intervals of about 2.2 to 2.4 metres, depending on panel type and soil conditions.
- Confirm that you have the correct type of post hardware for your chosen panels (panel clips or brackets that fit your system).
A clear plan helps you order materials efficiently and minimises the number of trips to the shop.
Set your first post
The first post is the foundation of the fence, so take extra care with this step. A solid first post sets the alignment for the entire run.
- Dig a hole to at least a third of the post length in depth. For a typical 2.4 m post, that’s roughly 60–75 cm. Local soil conditions may require deeper holes for stability, especially in windy areas.
- Add a few centimetres of post mix or sub-base into the hole to provide a solid bed.
- Place the post into the hole and check that it’s plumb using a spirit level. A slight lean can be corrected by adjusting the mixture around the post.
- Bracing is essential while the concrete sets. Temporarily brace the post so it remains perfectly vertical.
- Leave it to set according to the product’s instructions. In many cases, this is about 24 hours, but it can vary.
Patience at this stage pays off with a straight fence line. If you are using a drive-in spike instead of concrete, ensure the spike penetrates the ground firmly and remains aligned before proceeding.
Work along the run
With the first post solid, you can begin attaching the first panel and continuing along the line.
- Attach the first panel to the initial post using the correct panel clips or brackets. Ensure the panel is level and square to the fence line before securing.
- Dig and set the next post in line, checking spacing and plumbness before pouring or driving in.
- Repeat the process: insert the next panel, verify alignment, and place the subsequent post. Each panel should align with the previous one to maintain a clean, even border.
- If you encounter irregularities (slight dips or rises in the ground), adjust your post positions accordingly before setting them in concrete or spikes.
A steady rhythm here keeps the fence true and helps you avoid major alignment fixes later on.
Check as you go
Ongoing checks prevent bigger issues down the line. Use a string line between your first and last post to keep everything in alignment.
- Tie a string at the height you want the panels to sit, spanning from the first to the last post. This gives you a visual reference for straightness.
- After placing several posts and panels, step back and verify that the fence line is even and upright. Look for any consistent tilt or buckling that’s out of alignment.
- It’s much easier to correct a slight lean early on than after the concrete has set. If you notice issues, adjust immediately by realigning posts or giving the concrete more time to set before continuing.
Regular checks save you time and ensure your fence looks professionally installed.
Finishing touches
The finishing touches protect the fence and enhance its longevity.
- Add post caps to protect the tops of timber posts from rainwater ingress. Caps also give a neat, finished appearance.
- Apply a fence treatment or stain if your panels aren’t pre-treated. This helps guard against weathering and can extend the life of the fence.
- Inspect for any sharp edges or protruding nails or screws and secure as needed.
If you’re unsure about any step, don’t hesitate to ask for guidance. A quick chat with a fencing specialist can save time and help you avoid common mistakes.
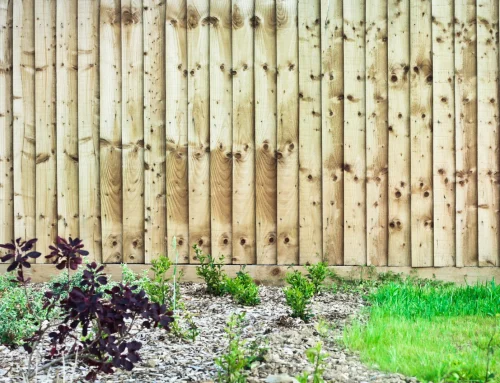
Fitting fence panels is a practical DIY project that rewards careful planning, precise measurement, and patient execution. By following a clear plan, setting the first post correctly, and maintaining consistent alignment as you work, you can achieve a sturdy, visually appealing fence. Remember to prepare your materials in advance, use proper bracing during setting, and finish with protective caps and treatments to extend the life of your fencing.
If you’re still unsure, a quick visit to Empress Fencing can help you confirm materials, panel types, and the best method for your specific yard. They’re a popular resource for many DIY enthusiasts looking to tackle fencing with confidence. A Beginner’s Guide to Fitting Fence Panels, accompanied by the right tools and a bit of patience, can turn a daunting task into a satisfying, well-executed project. Please check out our 6ft fence panels, decorative fence panels, decorative garden gates and fence posts range for more information.